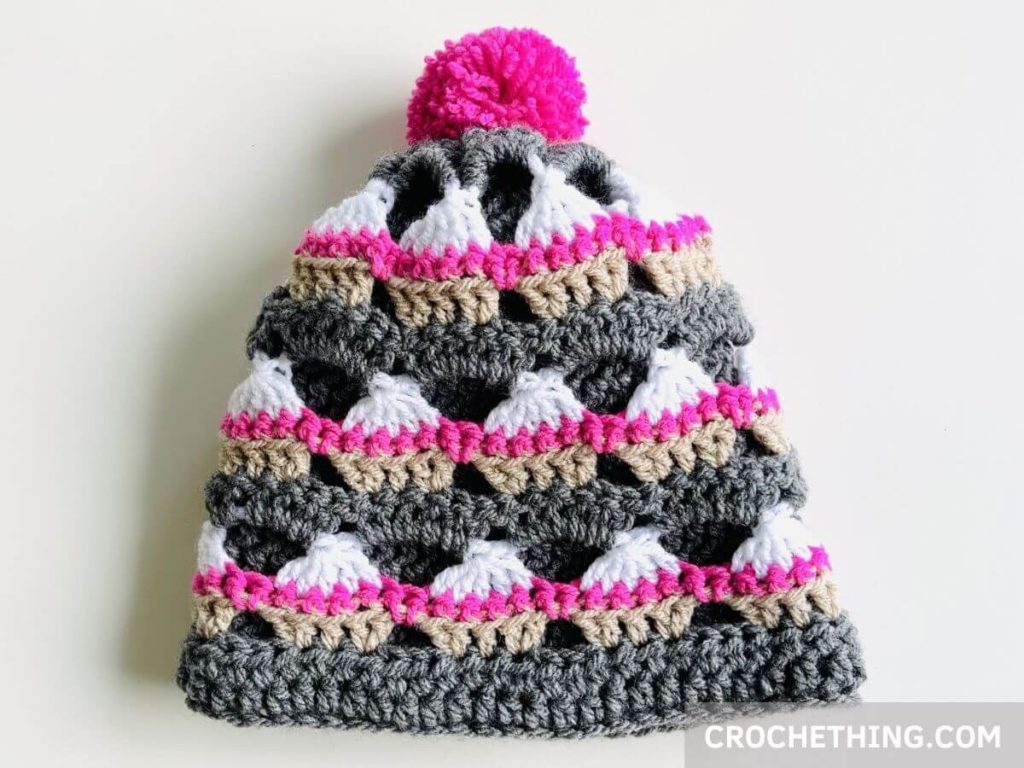
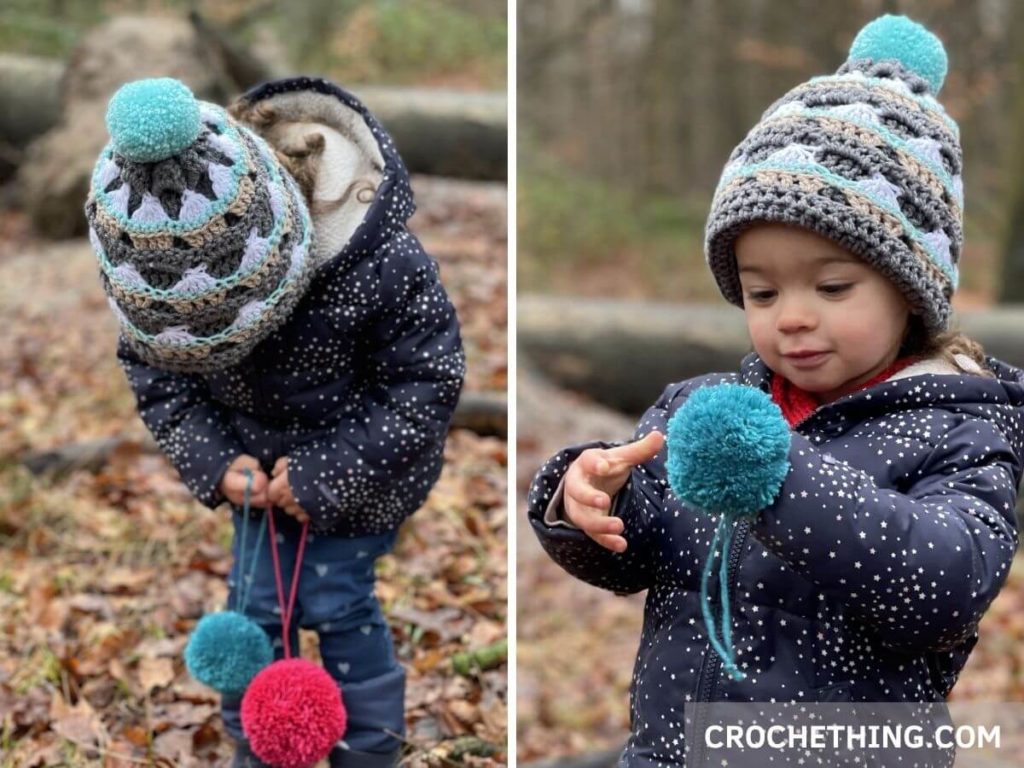
I had so much fun designing this cute Cup Cake Beanie, I’ve already made several versions 🤗 But even more I loved the photoshoot with the cutest model ever! Such a cutie pie 😍. This beanie is two sided and has a beautiful texture on the inside. It’s made out of a ‘tunnel’ which is folded in half. Make your own reversible ‘cup cake beanie’ which is twice as warm. Scroll down for my free pattern and step by step video tutorial.
About this cup cake beanie
This cup cake beanie is made from a long ‘tunnel’. Both ends will be closed and one half is folded inside the other. We will start with the easiest part with a basic color for the inside. Then we continue with part 2 which uses the cup cake stitch. Optionally you can finish off with a pom pom.
Other free patterns
Cup Cake Beanie
Materials:
– Weight 3/light, Schachenmayr Bravo 145yds/1.75oz, 133m/50g)
62g (76g) of color 08319 grey (beanie basics)
8g of color 08267 light brown (cake)
6g of color 08366 teal or 08305 pink (glazing)
11g of color 08224 white (topping)
– Crochet hook 6mm
– Darning needle
– Scissors
– Stitch marker
Abbreviations:
ch: chain
sl st: slip stitch
sc: single crochet
sc flo: single crochet front loop only
hdc: half double crochet
hdc blo: half double crochet back loop only
dc: double crochet
dc5tog: double crochet 5 together (also called 5 dc cluster) *Yarn over (yo), insert hook into next st, yo, pull up a loop, yo, pull through 2 loops * repeat in next 4 stitches. You’ll now have 6 loops on your hook. Yo, pull through all 6 loops.
Gauge:
14 hdc blo x 12 rows = 4” square / 10 x 10 cm
Sizes:
fits circumference
Toddler 20″
Kids 20″
Teen/ XS 22″
Adult 24”
Measurements:
When lying flat:
Toddler
Width: 10″ / 25 cm
Height: 8″ / 20 cm
Child
Width: 10″ / 25 cm
Height: 9″ / 23 cm
Teen/XS
Width: 11″ / 28 cm
Height: 10″ / 25 cm
Adult
Width: 12″ / 30,5 cm
Height: 11″ / 28 cm
Notes:
– First part of this beanie is worked in continuous rounds. Second part (cup cake stitch) is worked in turning rounds. Both ends of ‘tunnel’ are closed with a darning needle. One side will be folded inside the other.
– This pattern is written in US terms
– Place a stitch marker in the first stitch of a round so you can easily see where you started
– Turning chains do count as a stitch
– This pattern uses a multiple of 6 stitches
– If you want a slightly smaller beanie, use a smaller hook. Need a bigger beanie? Use a bigger hook!
– Directions for sizes are in parentheses such as “54 (54, 60, 66)” whereas ch 54 stands for toddler, 54 for child, 60 for teen/xs and 66 for adult size.
Video tutorial
To make it easier, I’ve made a video tutorial showing you how to make this cup cake beanie. You can also find my free written pattern below.
* Click here to watch the video on YouTube
Pattern
With hook size 6mm and color grey: make a slip knot and leave a long tail end for sewing later.
Chain 54 (54, 60, 66), sl st in the 1st ch to form a ring.
Work in continuous rounds.
Round 1
ch 2, 1 hdc in each ch across <54, 54, 60, 66 total>
Round 2
1 hdc blo in each st around <54, 54, 60, 66 total>
Repeat round 2 until round 19 (21, 25, 27)
Do not fasten off, we will continue with the cup cake part.
Cup Cake Stitch
Turn your work at the end of each round.
Round 1
1 hdc in next 53, 53, 59, 65 st, sl st in last st, turn <54, 54, 60, 66 total>
Round 2
ch 3, dc in each st around, sl st in 3rd ch, turn <54, 54, 60, 66 total>
Fasten off and rejoin in the 3rd stitch with light brown.
Round 3 – cake
ch 3, 1 dc in same stitch, 1 dc in next st, 2 dc in next st, ch 1, skip 3 st, *2 dc in next stitch, 1 dc in next st, 2 dc in next st, ch 1, skip 3 st* repeat around, sl st in 3rd ch, turn <11 cakes total>
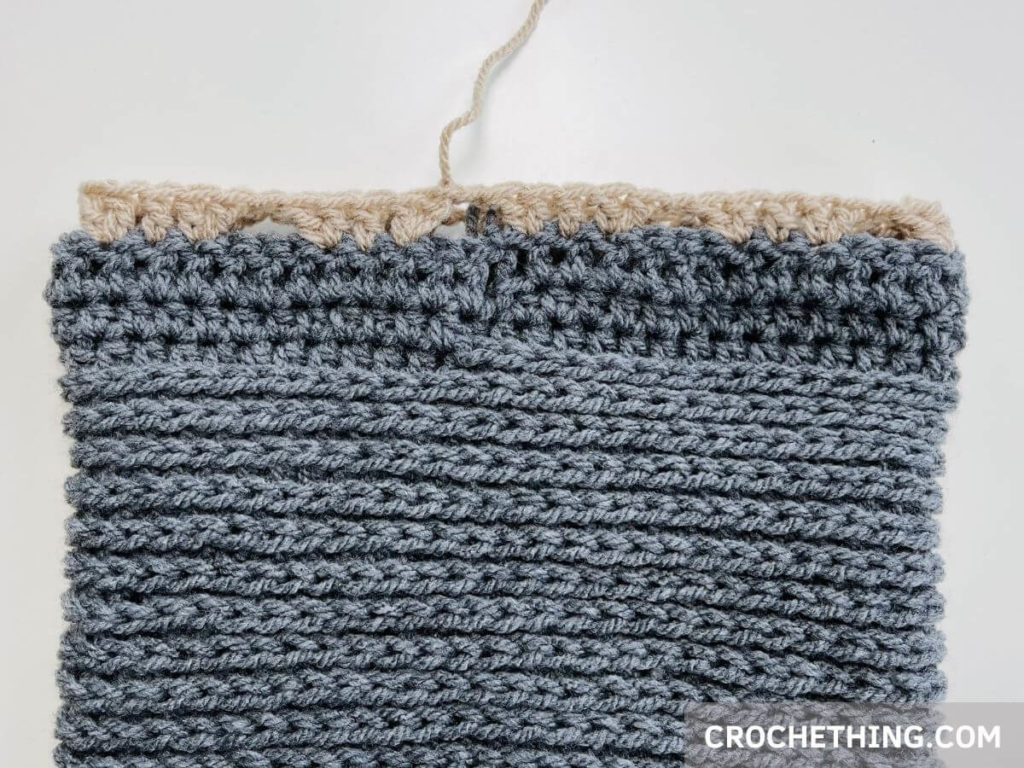
Fasten off and rejoin in the 1st st of a cake with teal or pink.
Round 4 – frosting
*1 sc flo in next 5 st, 1 sc in next ch-space* repeat around, sl st in 1st st, turn <54, 54, 60, 66 total>
Fasten off and rejoin in the last sc flo with white.
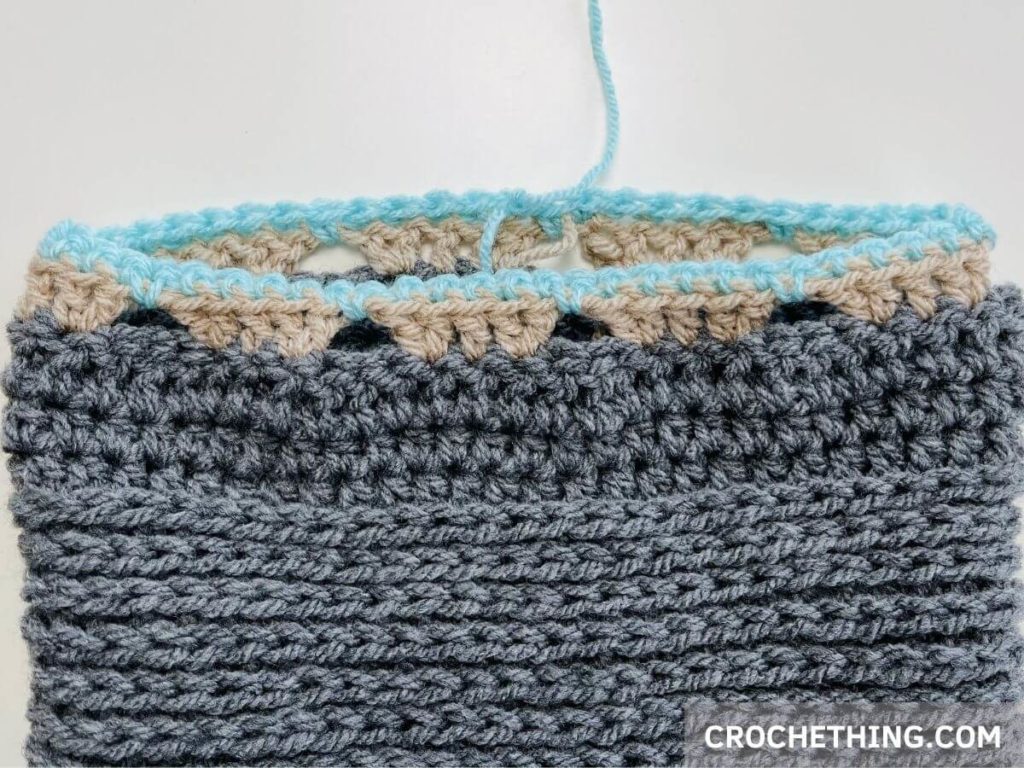
Round 5 – topping
*dc5tog, ch 6, skip next st* repeat around, sl st in 1st dc5tog, turn <11 dc5tog / clusters>
Fasten off and rejoin in a ch-space with grey.
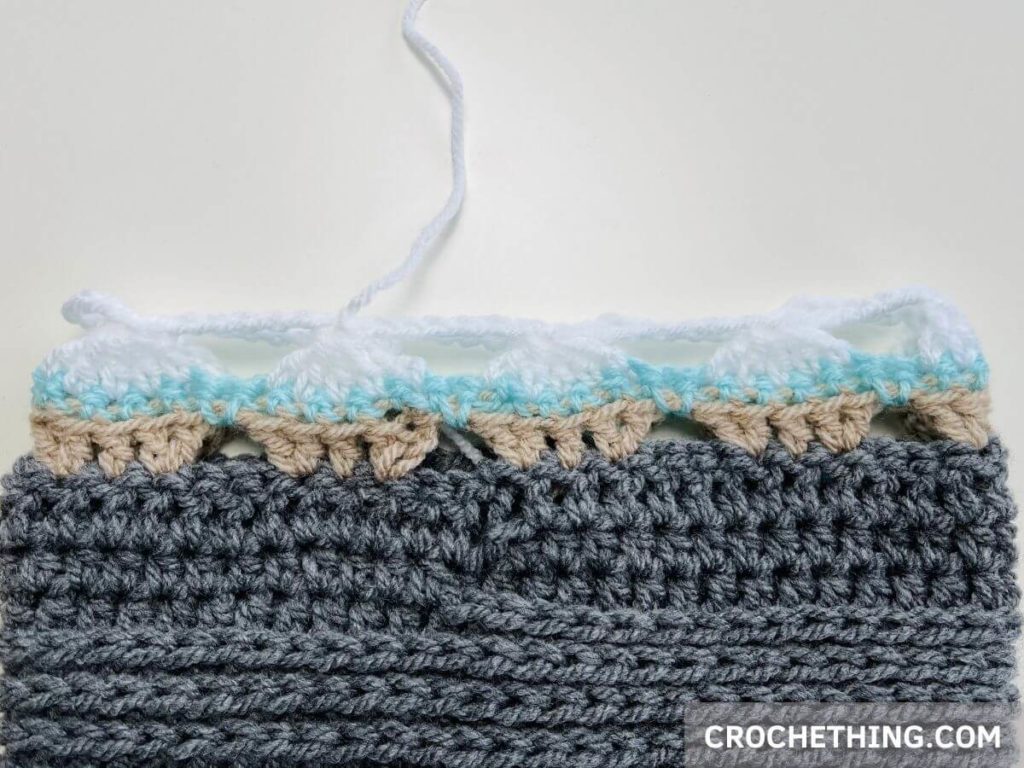
Round 6
ch 3, 5 dc in same ch sp, 6 dc in each ch-space around, sl st in 3rd ch, turn <54, 54, 60, 66 total>
Fasten off and rejoin in the 3rd stitch with light brown.
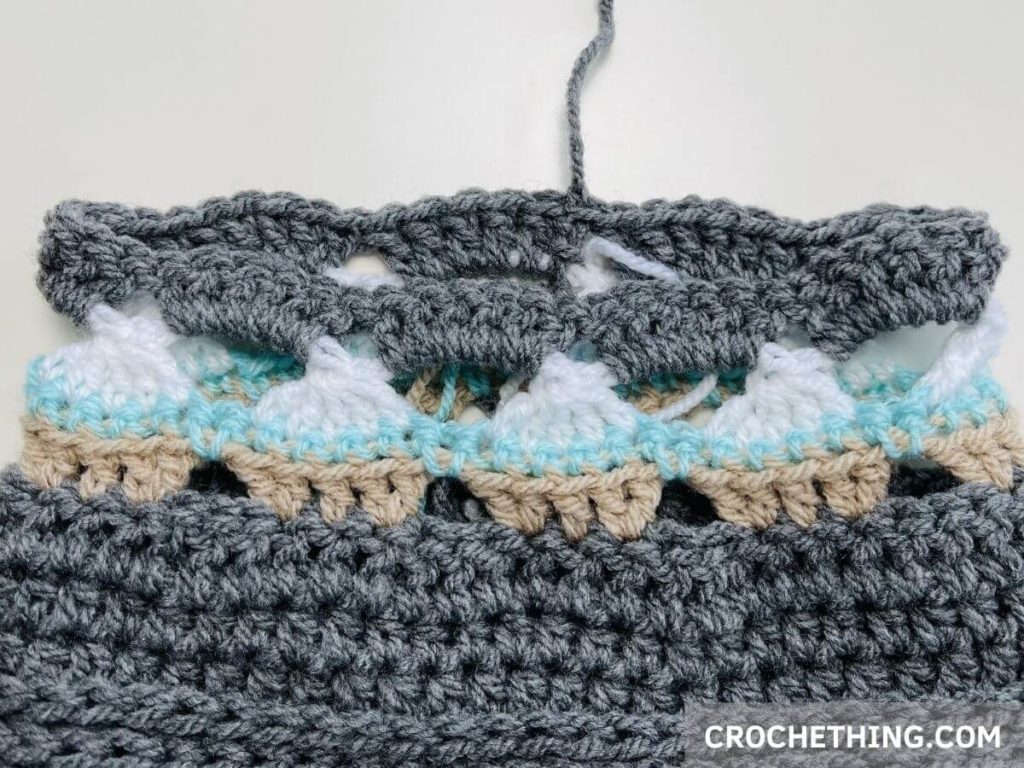
For all sizes:
Round 7 – 18
repeat round 3, 4, 5 & 6 consecutively 2 more times
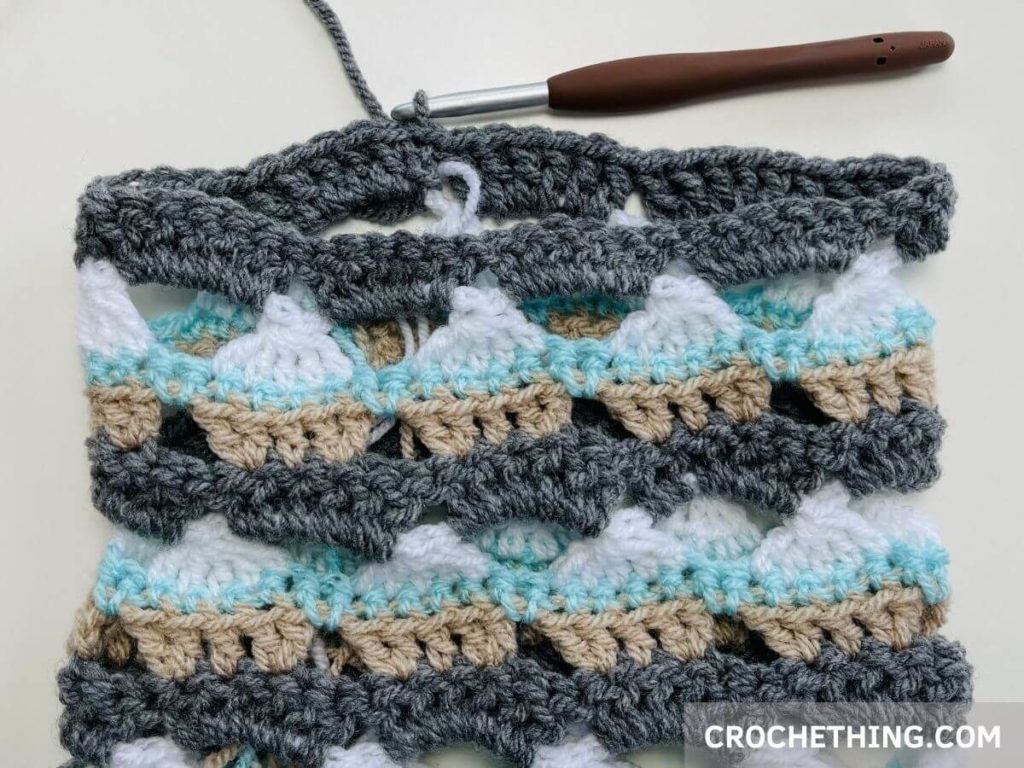
Round 19
ch 2, hdc in each st around <54, 54, 60, 66 total>
Fasten off and leave a long end for sewing
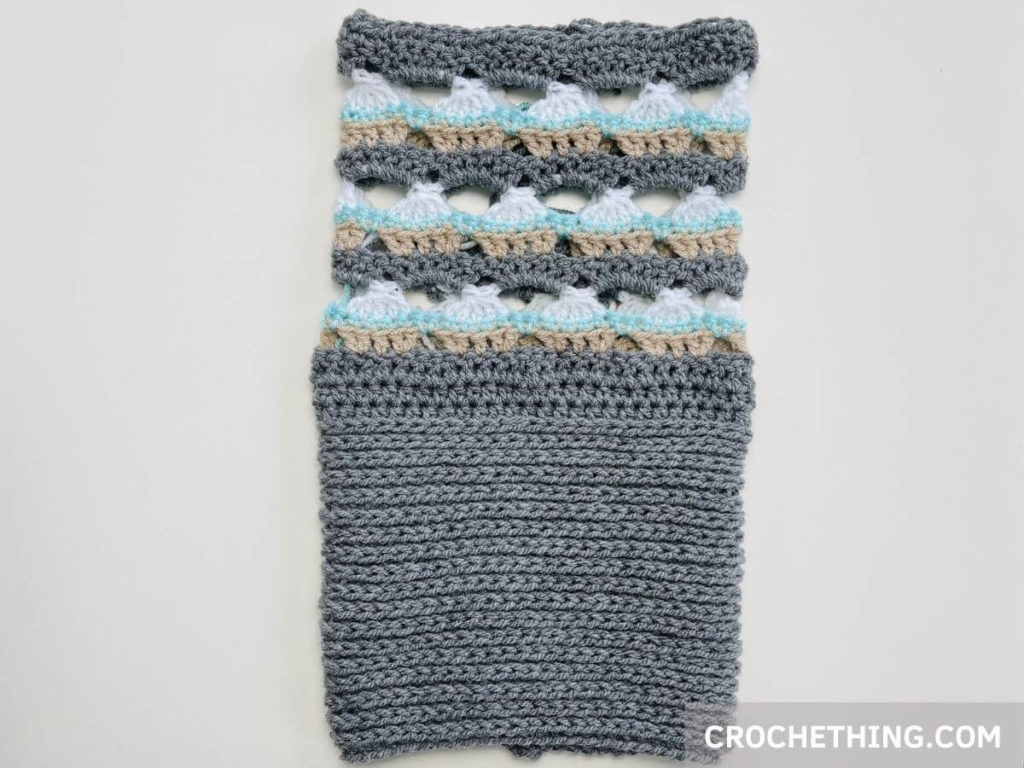
Assembly
– Turn your work inside out
– Weave in all the ends
– Turn your work inside out (good side facing out)
– Use a darning needle to close both ends of the beanie.
– Fold one half of the beanie in the other half
Tadaa! A warm and beautiful cup cake beanie.
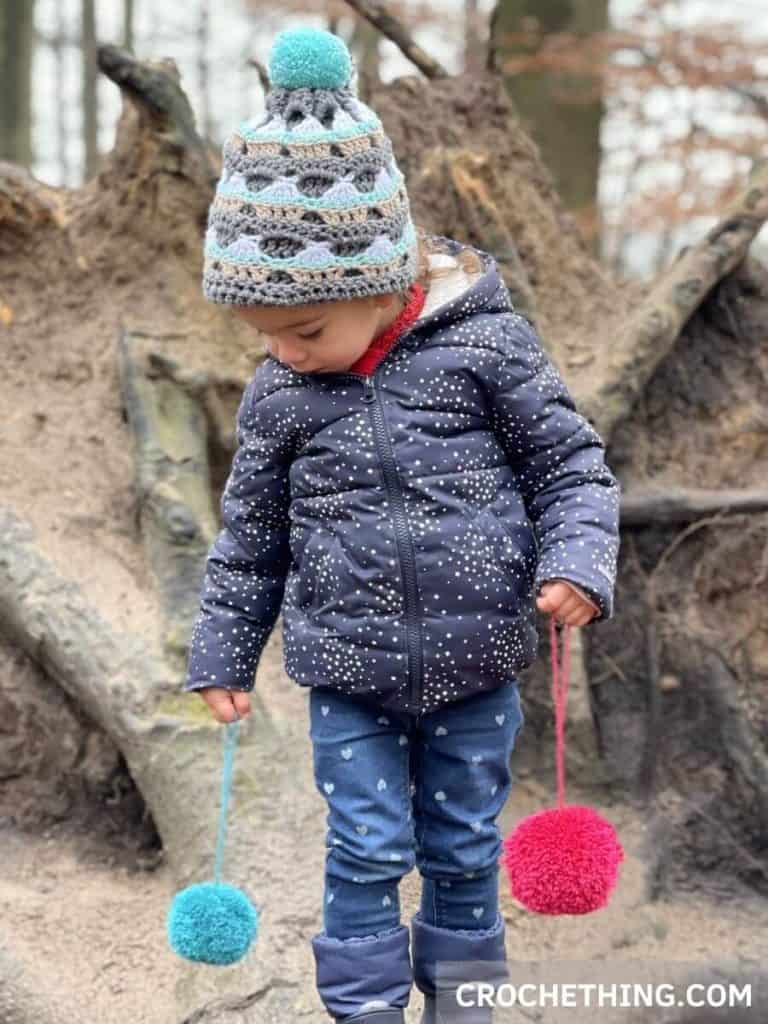
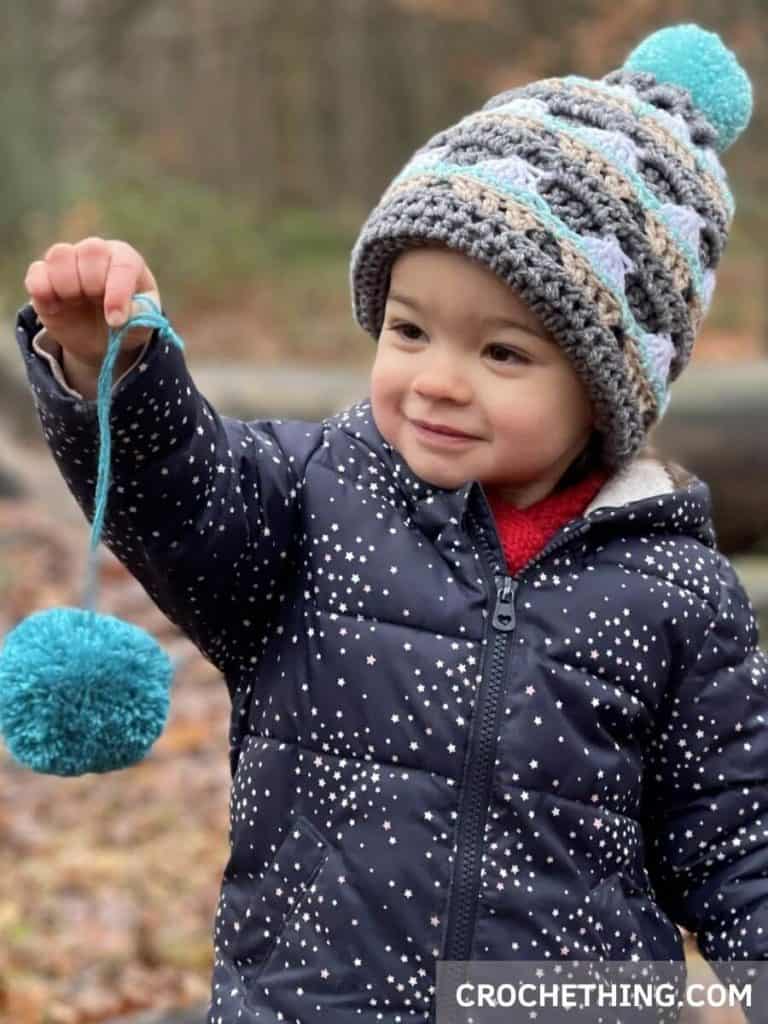
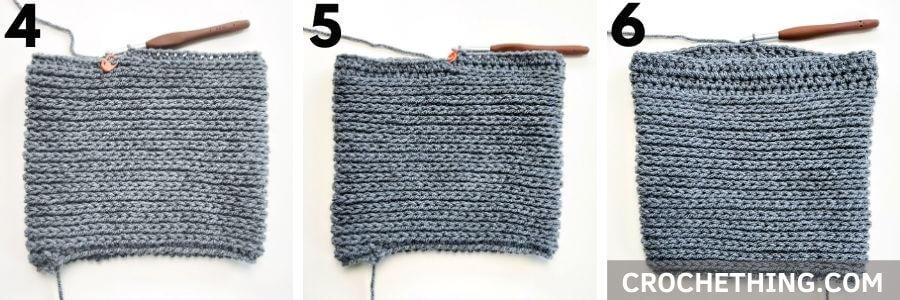
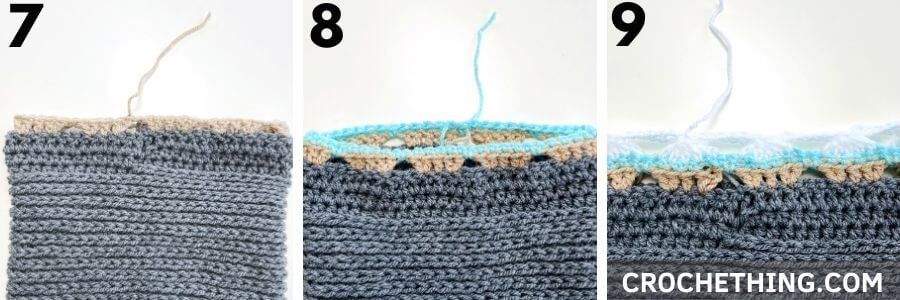
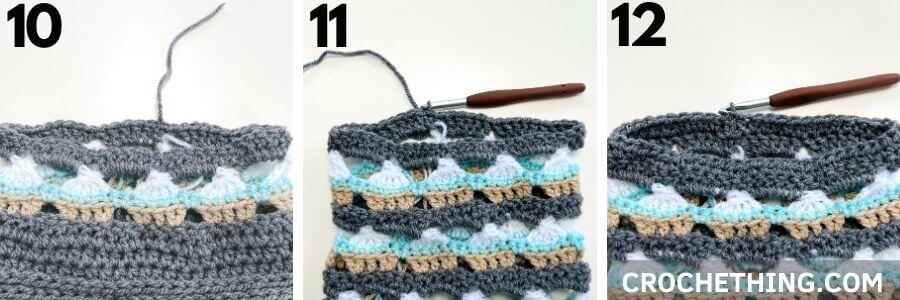
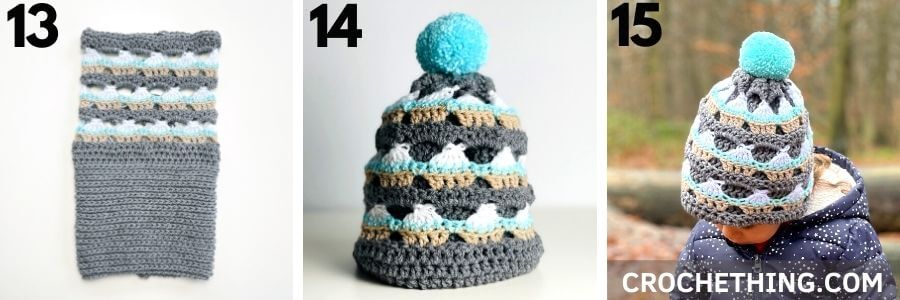
Photo tutorial
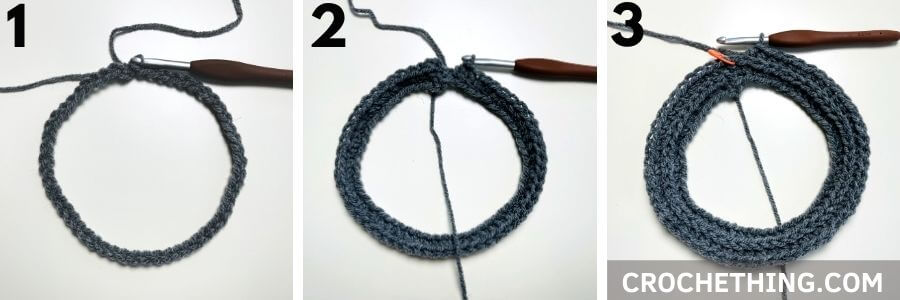
1. joined chs
2. round 1
3. round 2
4. round 19
5. round 1 cup cake part
6. round 2 cup cake part
7. round 3 cake
8. round 4 glazing
9. round 5 topping
10. round 6
11. round 18
12. round 19
13. the tunnel
14. the Cup Cake Beanie
15. Cute model 😍


Leave a Reply