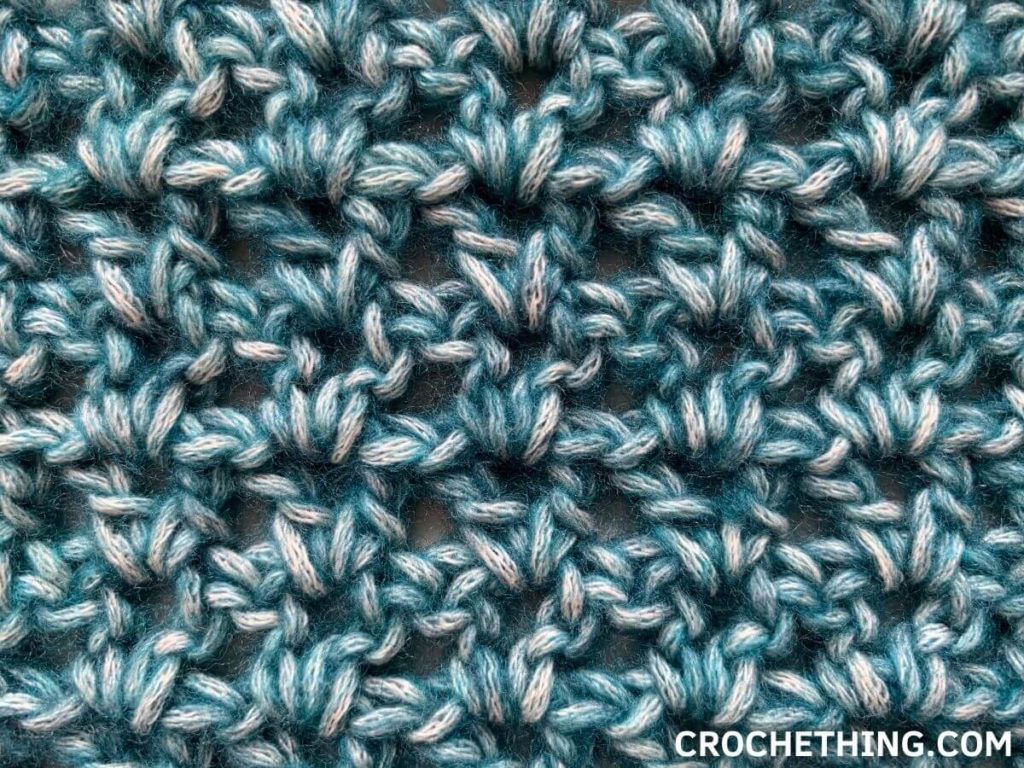
Not sure if the V stands for Very-pretty, but it certainly is! The V-stitch is a simple but beautiful stitch and is often used for blankets, hats and shawls. The abbreviation is V-ST in most patterns. The stitch might look complex, but it’s super easy to make. In the tutorial below, I will show you step by step how to make the V-stitch. So watch, learn and let’s create together!
V-stitch: the basics
There are different ways to crochet the V-stitch. The most common version is worked with (1 DC, 1 ch, 1 DC) into the same stitch. Other options would be with HDC or SC or 2 chains instead of 1. Each pattern will tell you which version of the V-stitch you’ll have to make. If nothing is mentioned, you can assume it’s the basic V-stitch which I’ll show you in this tutorial. Enjoy, and before you know, you will be an expert!
Tutorial: how to make a v-stitch
Abbreviations:
ch: chain
yo: yarn over
dc: double crochet
rep: repeat
sk: skip
Materials:
– Katia Basic Merino
– Crochet hook 4mm
Note:
Start with a multiple of 3 + 2. In this tutorial we chain 14 (12 + 2).
1. yarn over (yo) insert hook in 4th chain (ch) from the hook
2. double crochet (dc)
3. chain (ch) 1
4. double crochet (dc) in the same chain (ch)/ stitch (st)
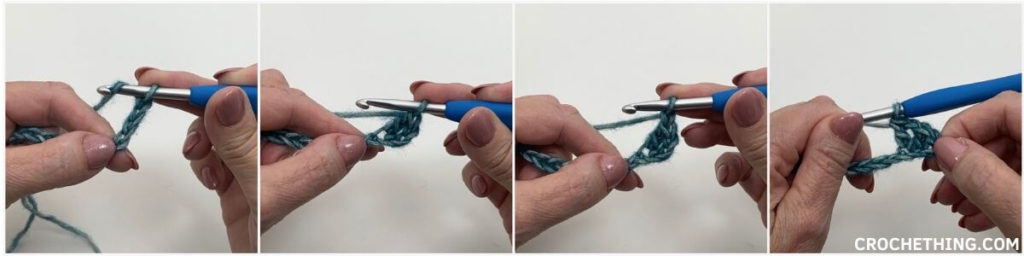
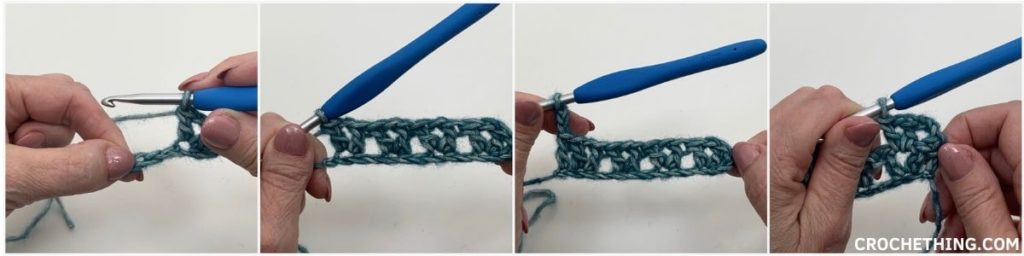
5. skip 2 chains / stitches & repeat step 2 – 4 (= v-stitch)
till end of the row
6. double crochet (dc) in the last chain
7. chain (ch) 3 & turn your work
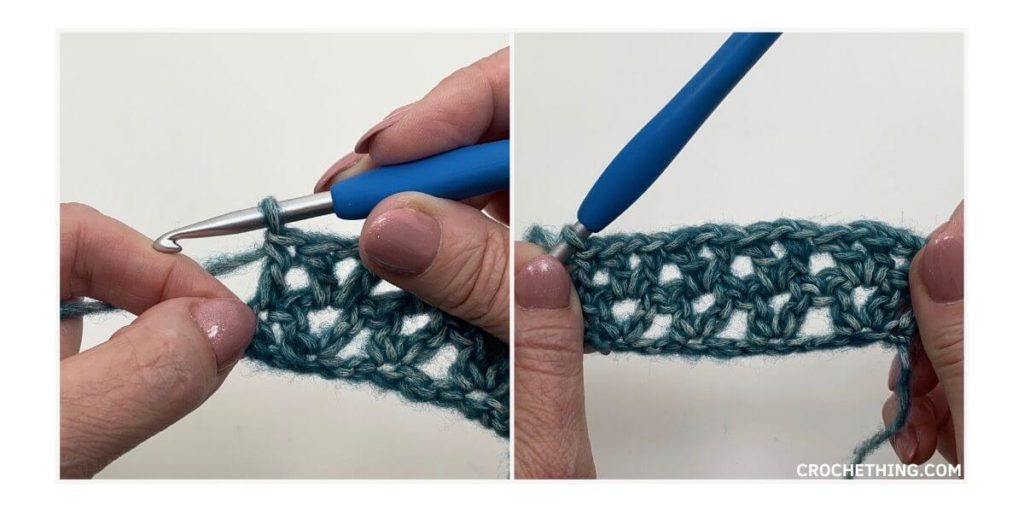
8. v-stitch (v-st) in each chain space (ch sp) of the previous row
9. double crochet (dc) in the 3rd chain (ch) of the previous row
10. That’s it!
Video
To make it easier, I’ve made a video tutorial showing you how to make the v-stitch.
Leave a Reply